


After struggling, reading, researching, and testing we finally have a full site-to-site OpenVPN tunnel from home to the Proxmox cluster I maintain at a local colocation facility (see infrastructure post - not written yet). There are a lot of posts that are either incomplete, not secure enough for my liking, or are very outdated. I hope this post serves as a good starting point that is consistently updated.
Requirements
⭕ OpenVPN tunnel should always be online even if my home IP changes
⭕ Subnets on both sides should be accessible by each side
⭕ Not all traffic should go through the VPN, only known subnets on both sides
⭕ No additional hardware, only existing Unifi USG at home and the pfSense SG-2440 at the colocation facility
The Setup
pfSense
We're going to use the GUI for the setup
First, let's set up the OpenVPN server on pfSense
Navigate to VPN > OpenVPN

Click Add to create a new server which will bring you to the OpenVPN server settings page
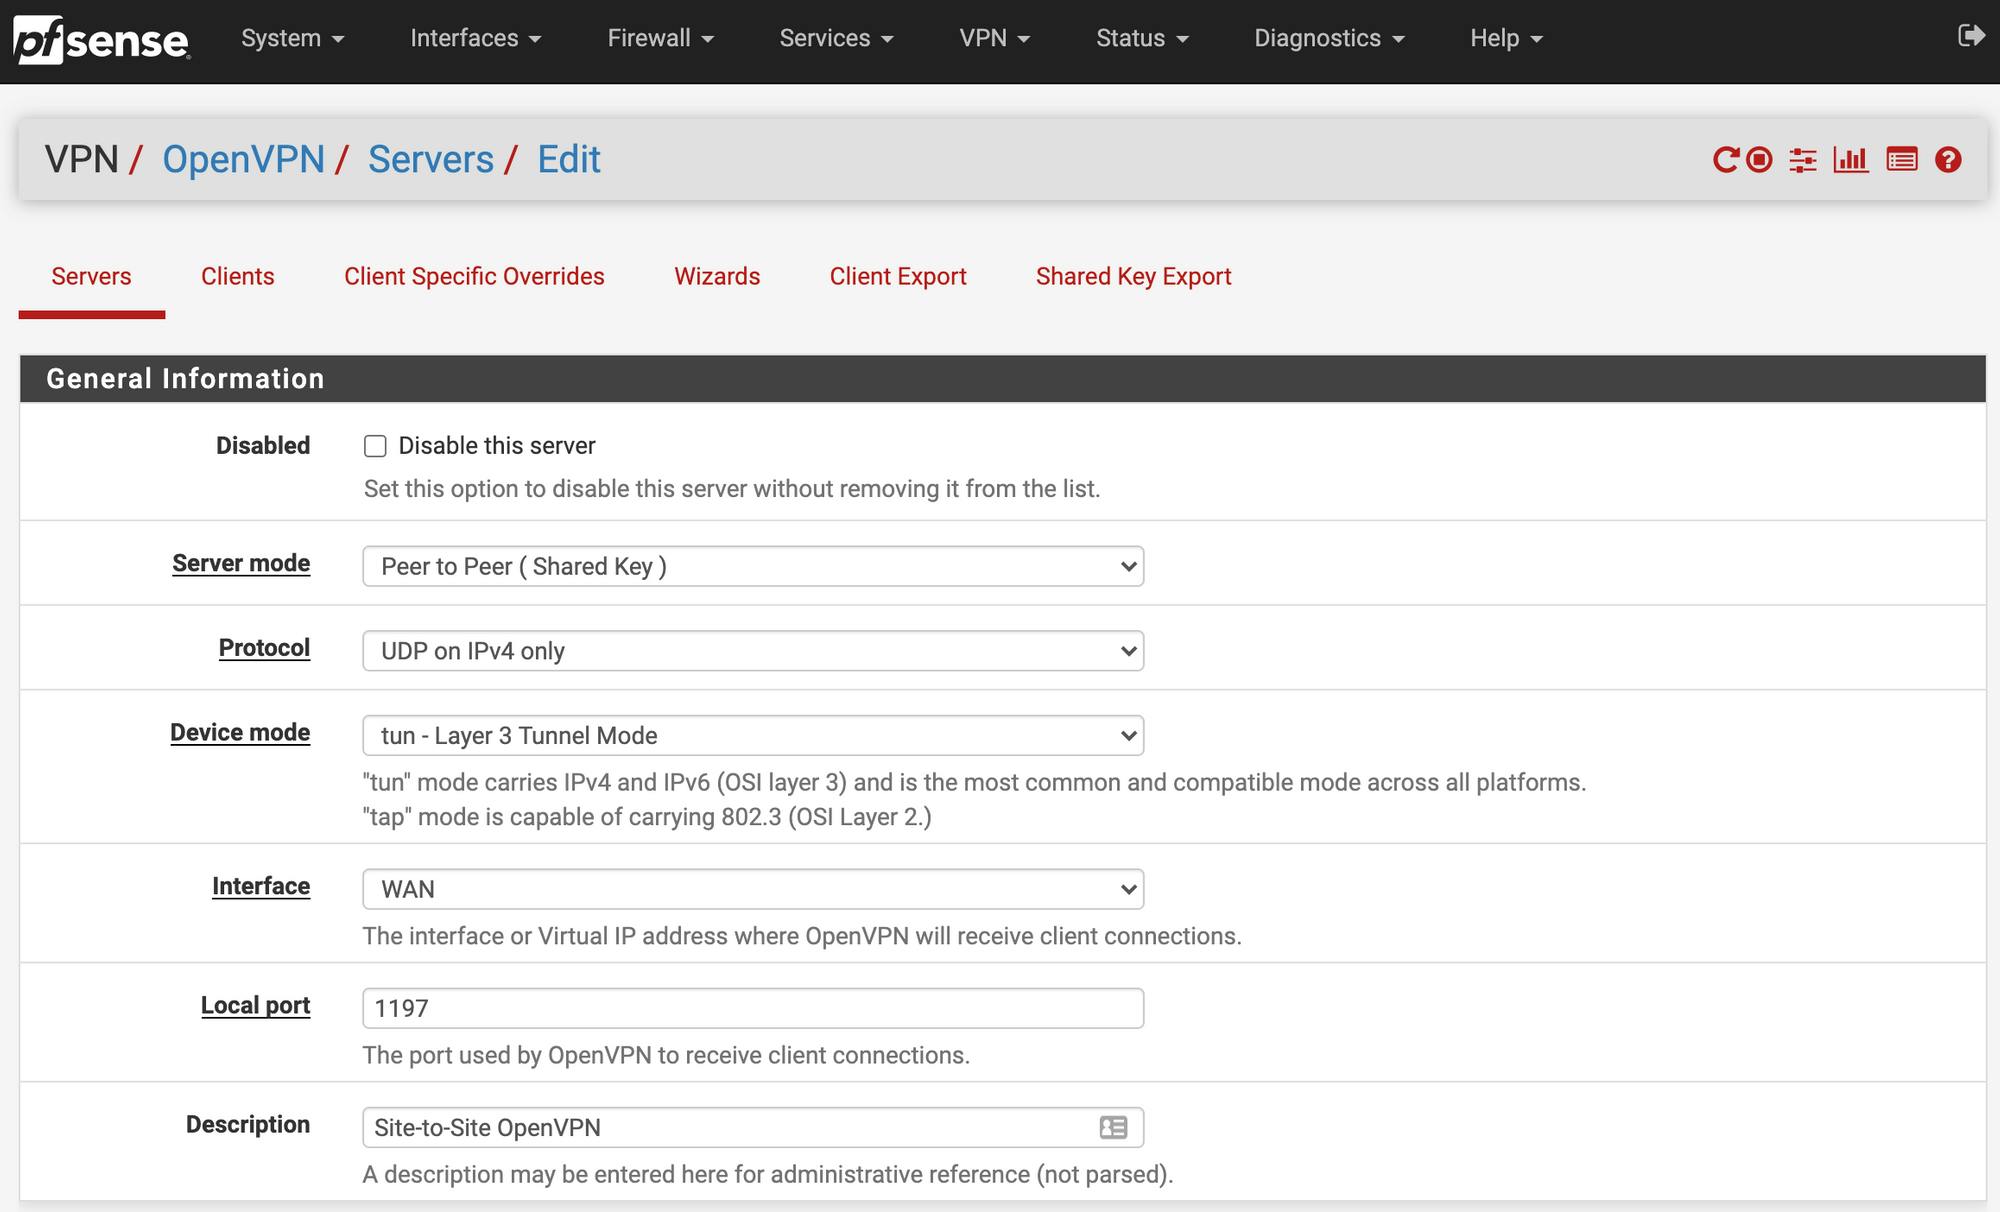
I changed the following settings, change to your preference
Server mode: Peer to Peer (Shared Key)
Protocol: UDP on IPv4 only
Device mode: tun - Layer 3 Tunnel Mode
Interface: WAN (or whichever is your WAN interface)
Local Port: 1197 - default is 1194 but I am using that port for another OpenVPN remote access server. This will be the port exposed to the WAN
Description: This is for your reference, name it as you please
Here is where the process gets tricky. Initially, I just pulled the pfSense-generated shared key and pasted it into the Unifi USG. I was not able to get this to function properly so I ended up SSHing into the USG and generating the key there and copying it out. More on this later.
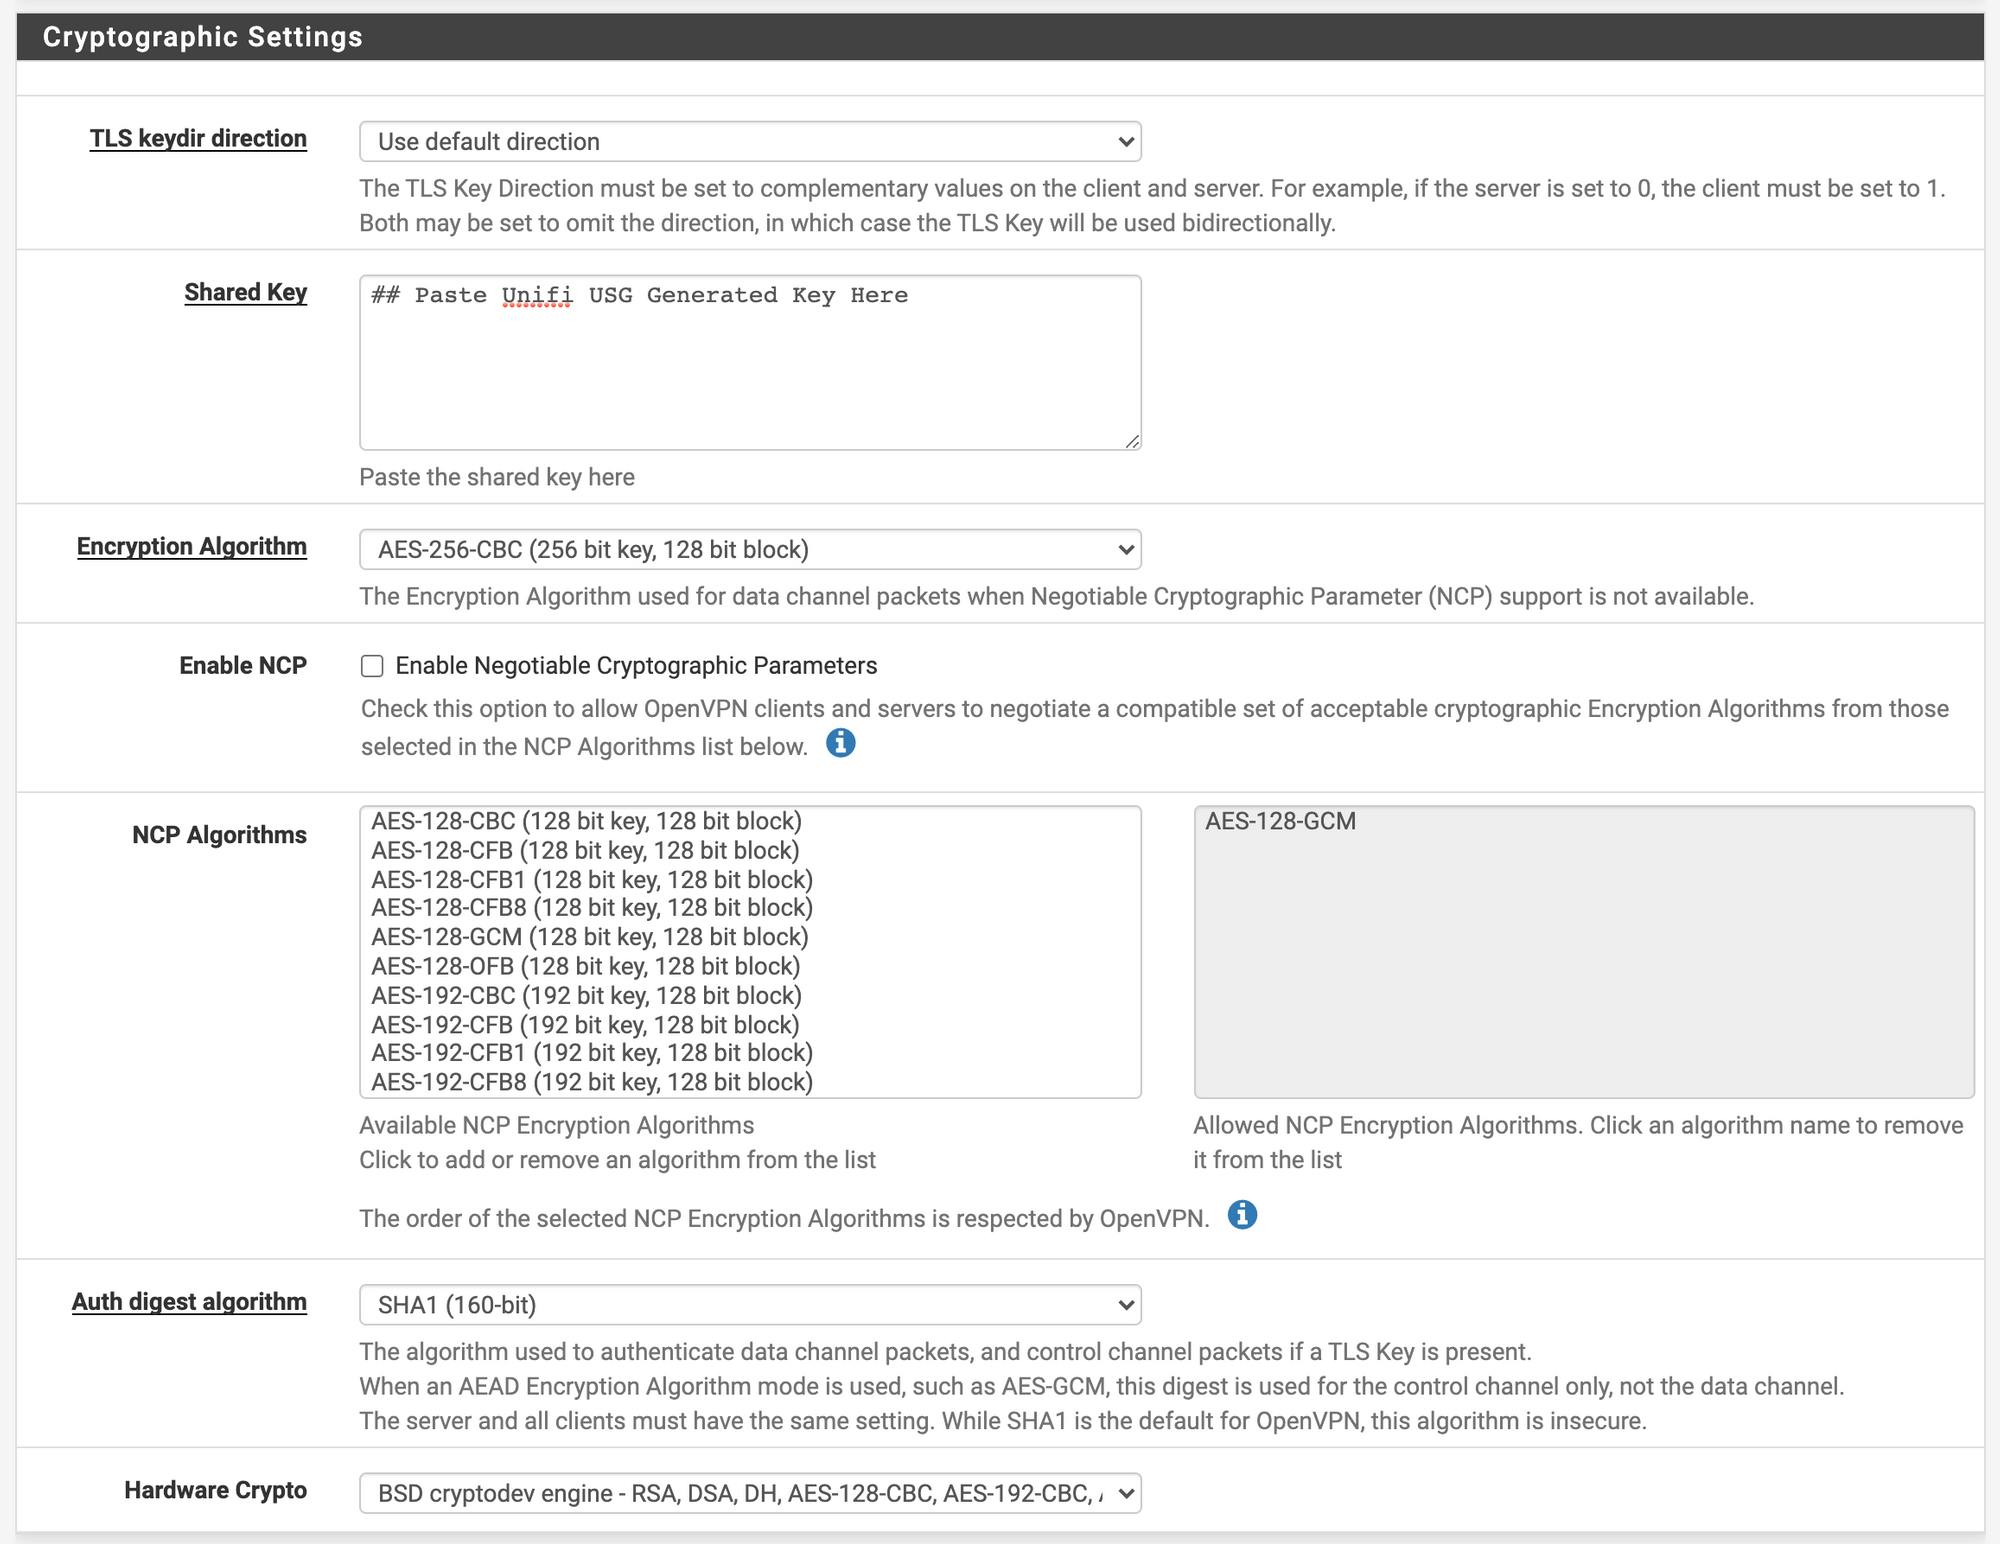
TLS key dir direction: Use default direction
Shared Key: Leave blank for now. We will come back and update it with the key from the USG
Encryption Algorithm: AES-256-CBC (highest supported by the USG)
Enable NCP: Unchecked
Auth digest algorithm: SHA1 (160-bit)
Hardware Crypto: Select what your hardware is capable
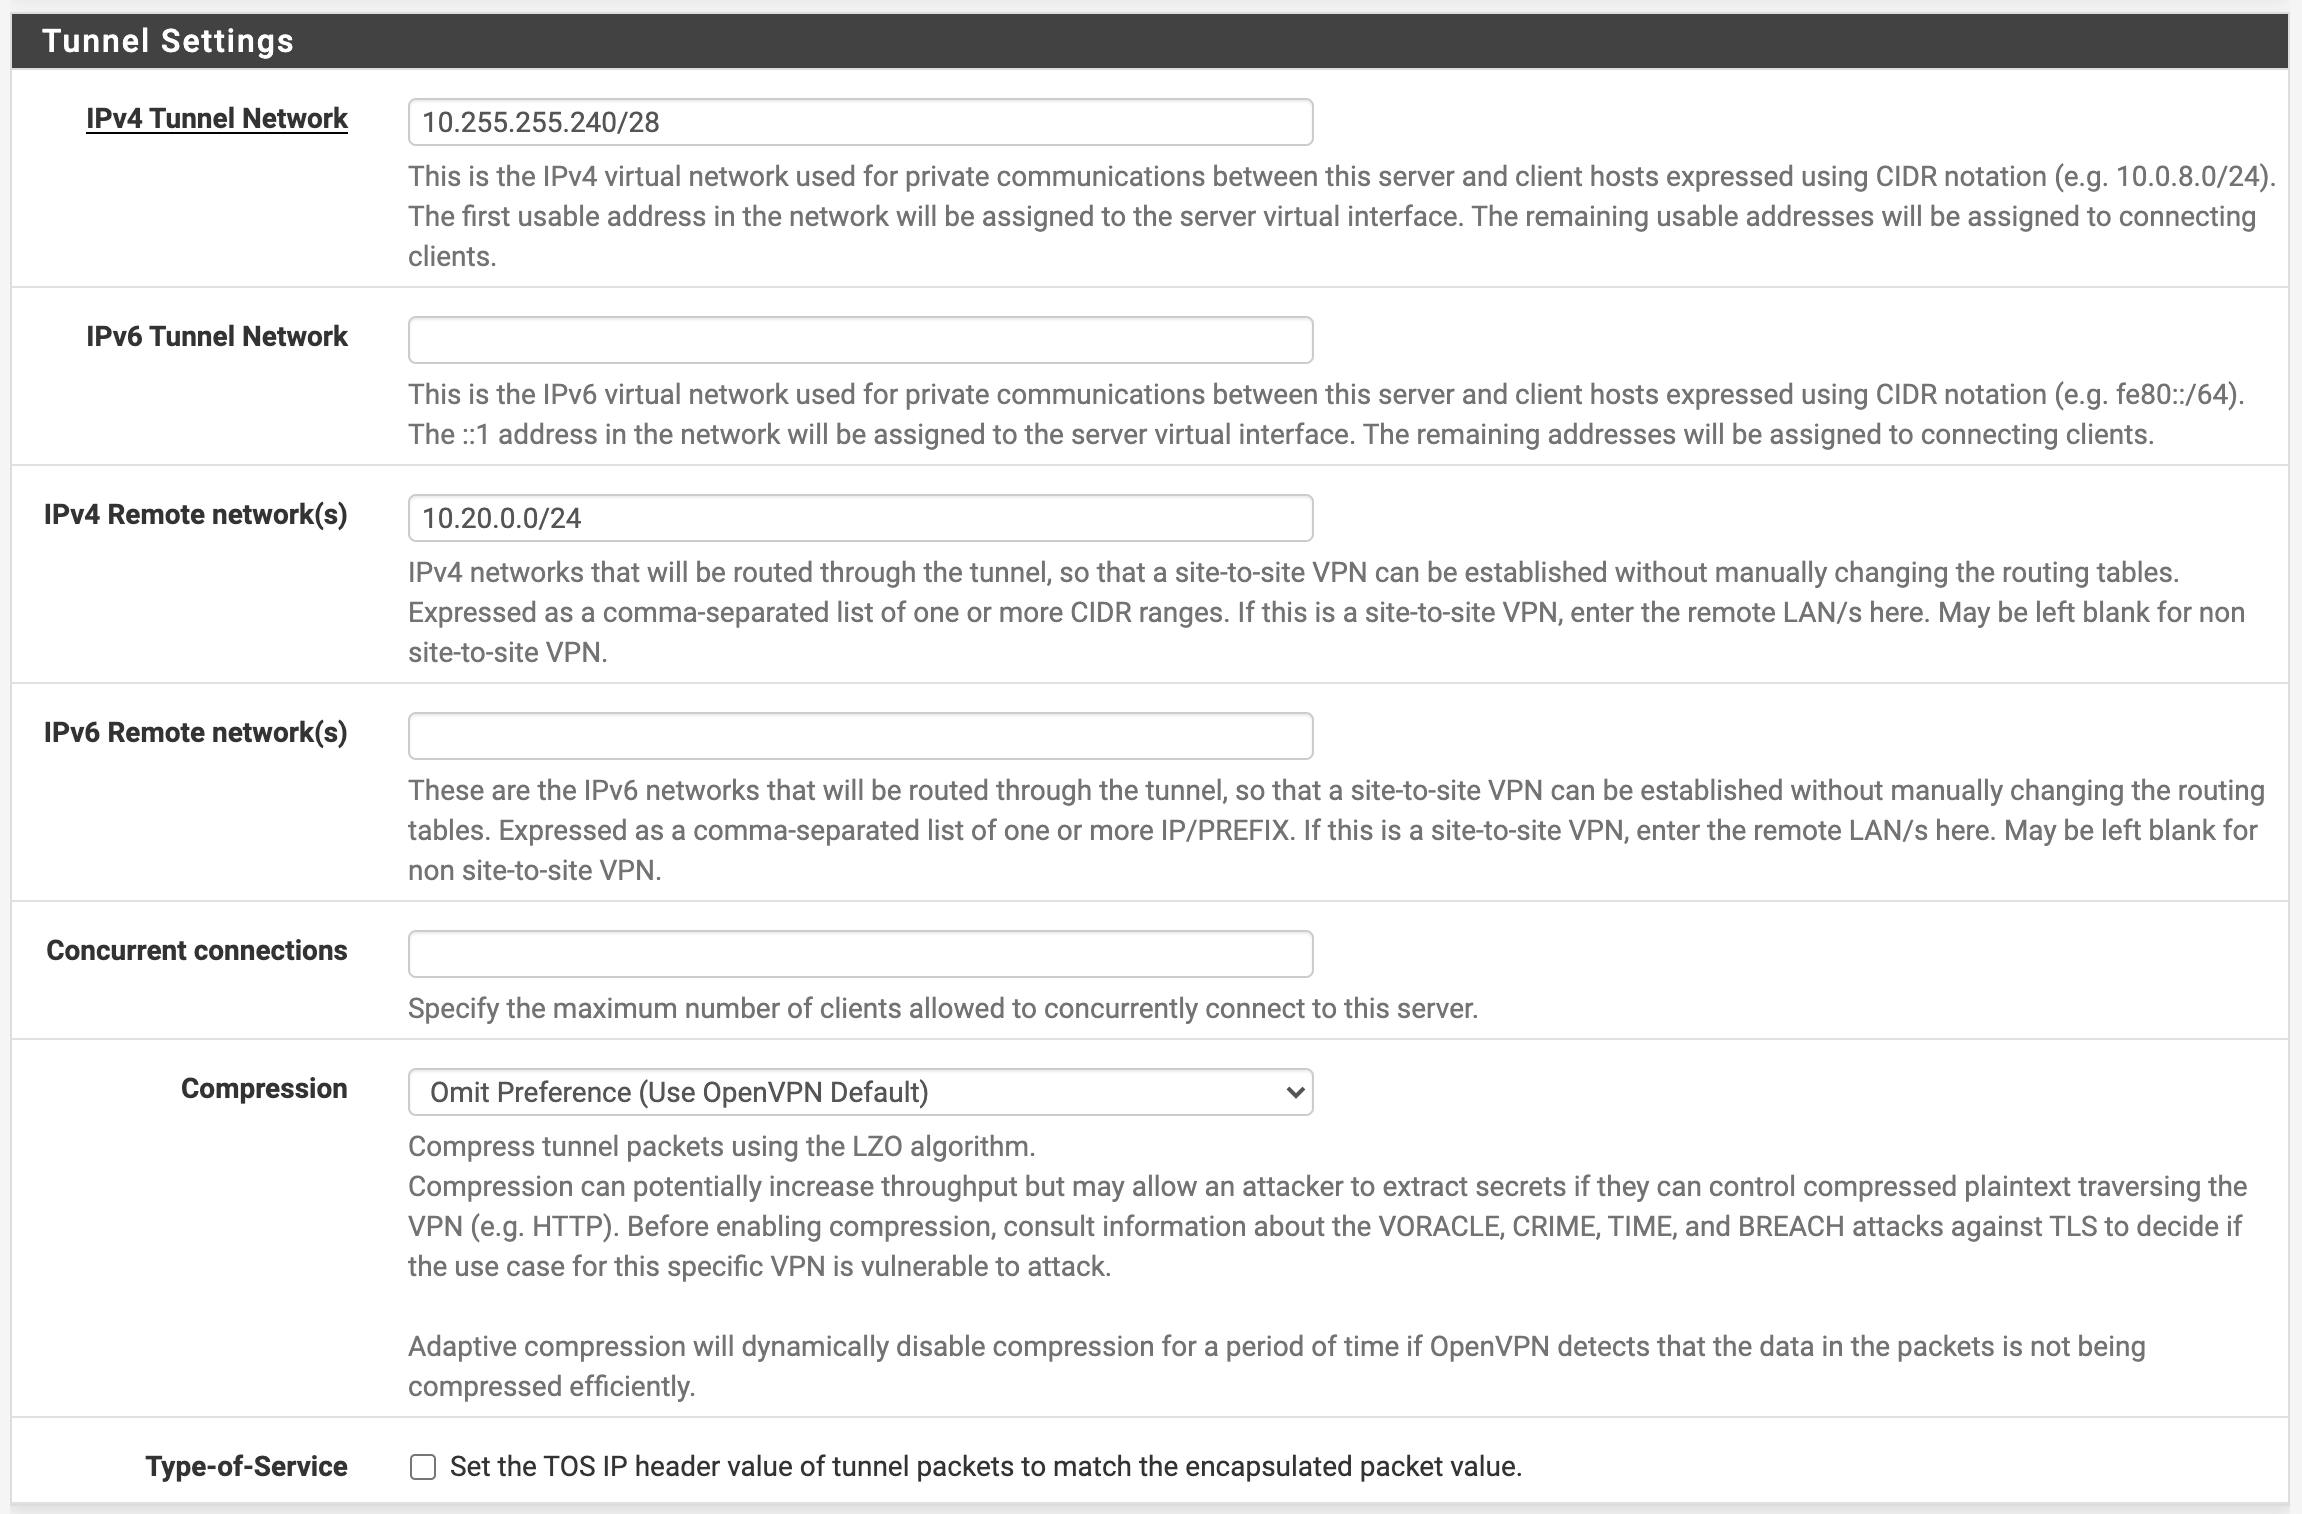
IPv4 Tunnel Network: 10.255.255.240/28 - set this to whatever you prefer. I chose a /28 since I plan to have a couple of other sites connecting to this server for friends' and family's access. You can set this to a /30 if there is only one remote site planned to be connected.
IPv6 Tunnel Network: Leave Blank
IPv4 Remote Network(s): This will be a list of subnets at my home location that should be routed over the tunnel. These cannot overlap with any subnets routed by pfSense
IPv6 Remote network(s): Leave blank
Concurrent connections: Leave blank
Compression: Omit Preference (Use OpenVPN Default)
Type-of-Service: Unchecked
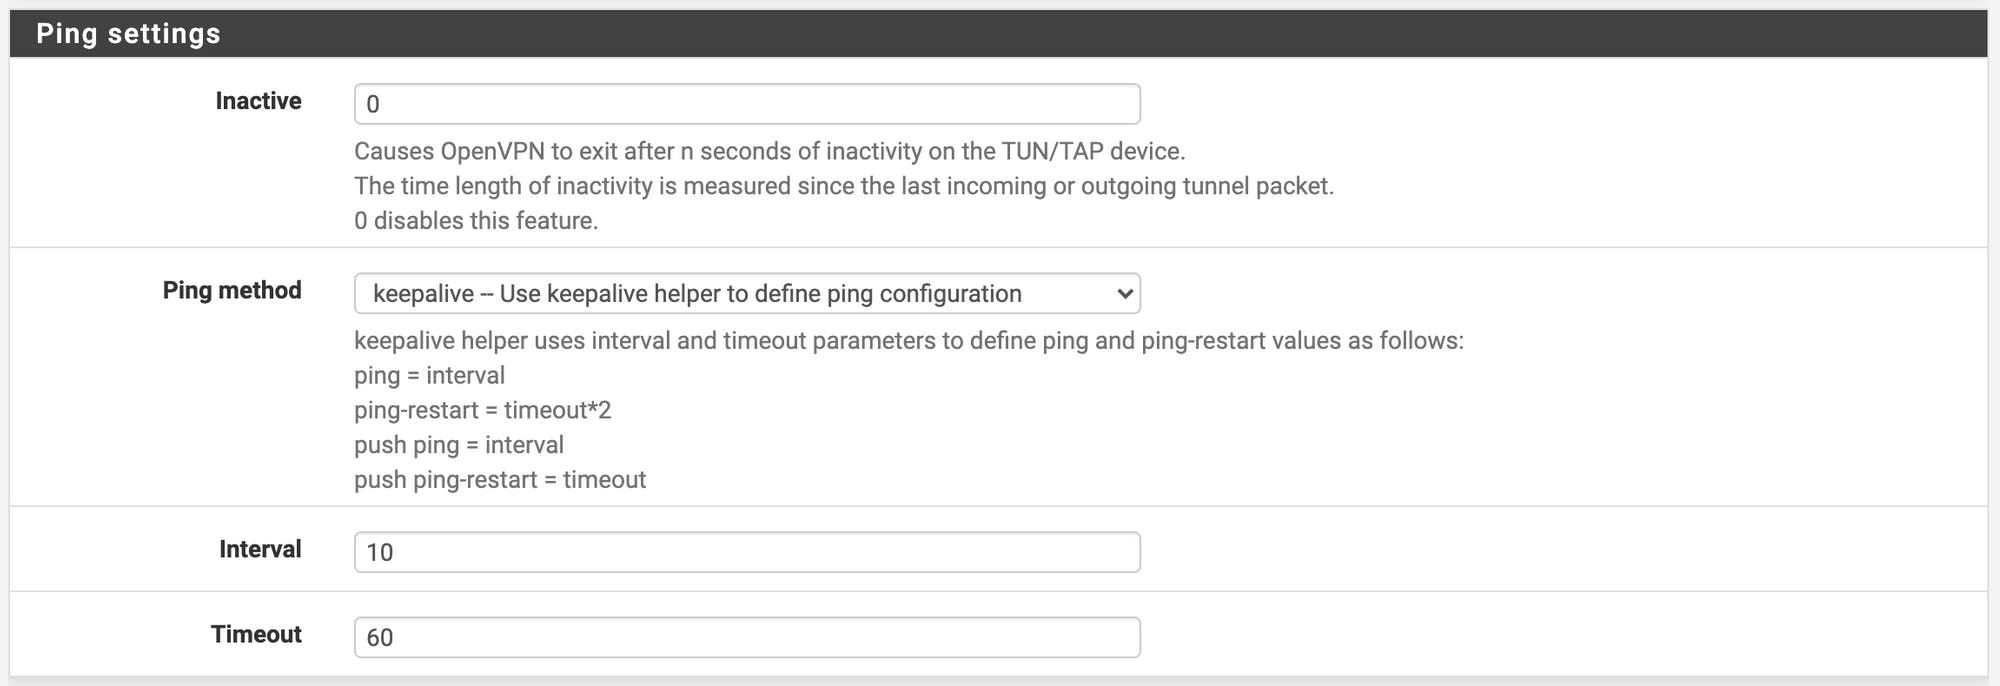
Inactive: 0
Ping method: keepalive
Interval: 10
Timeout: 60
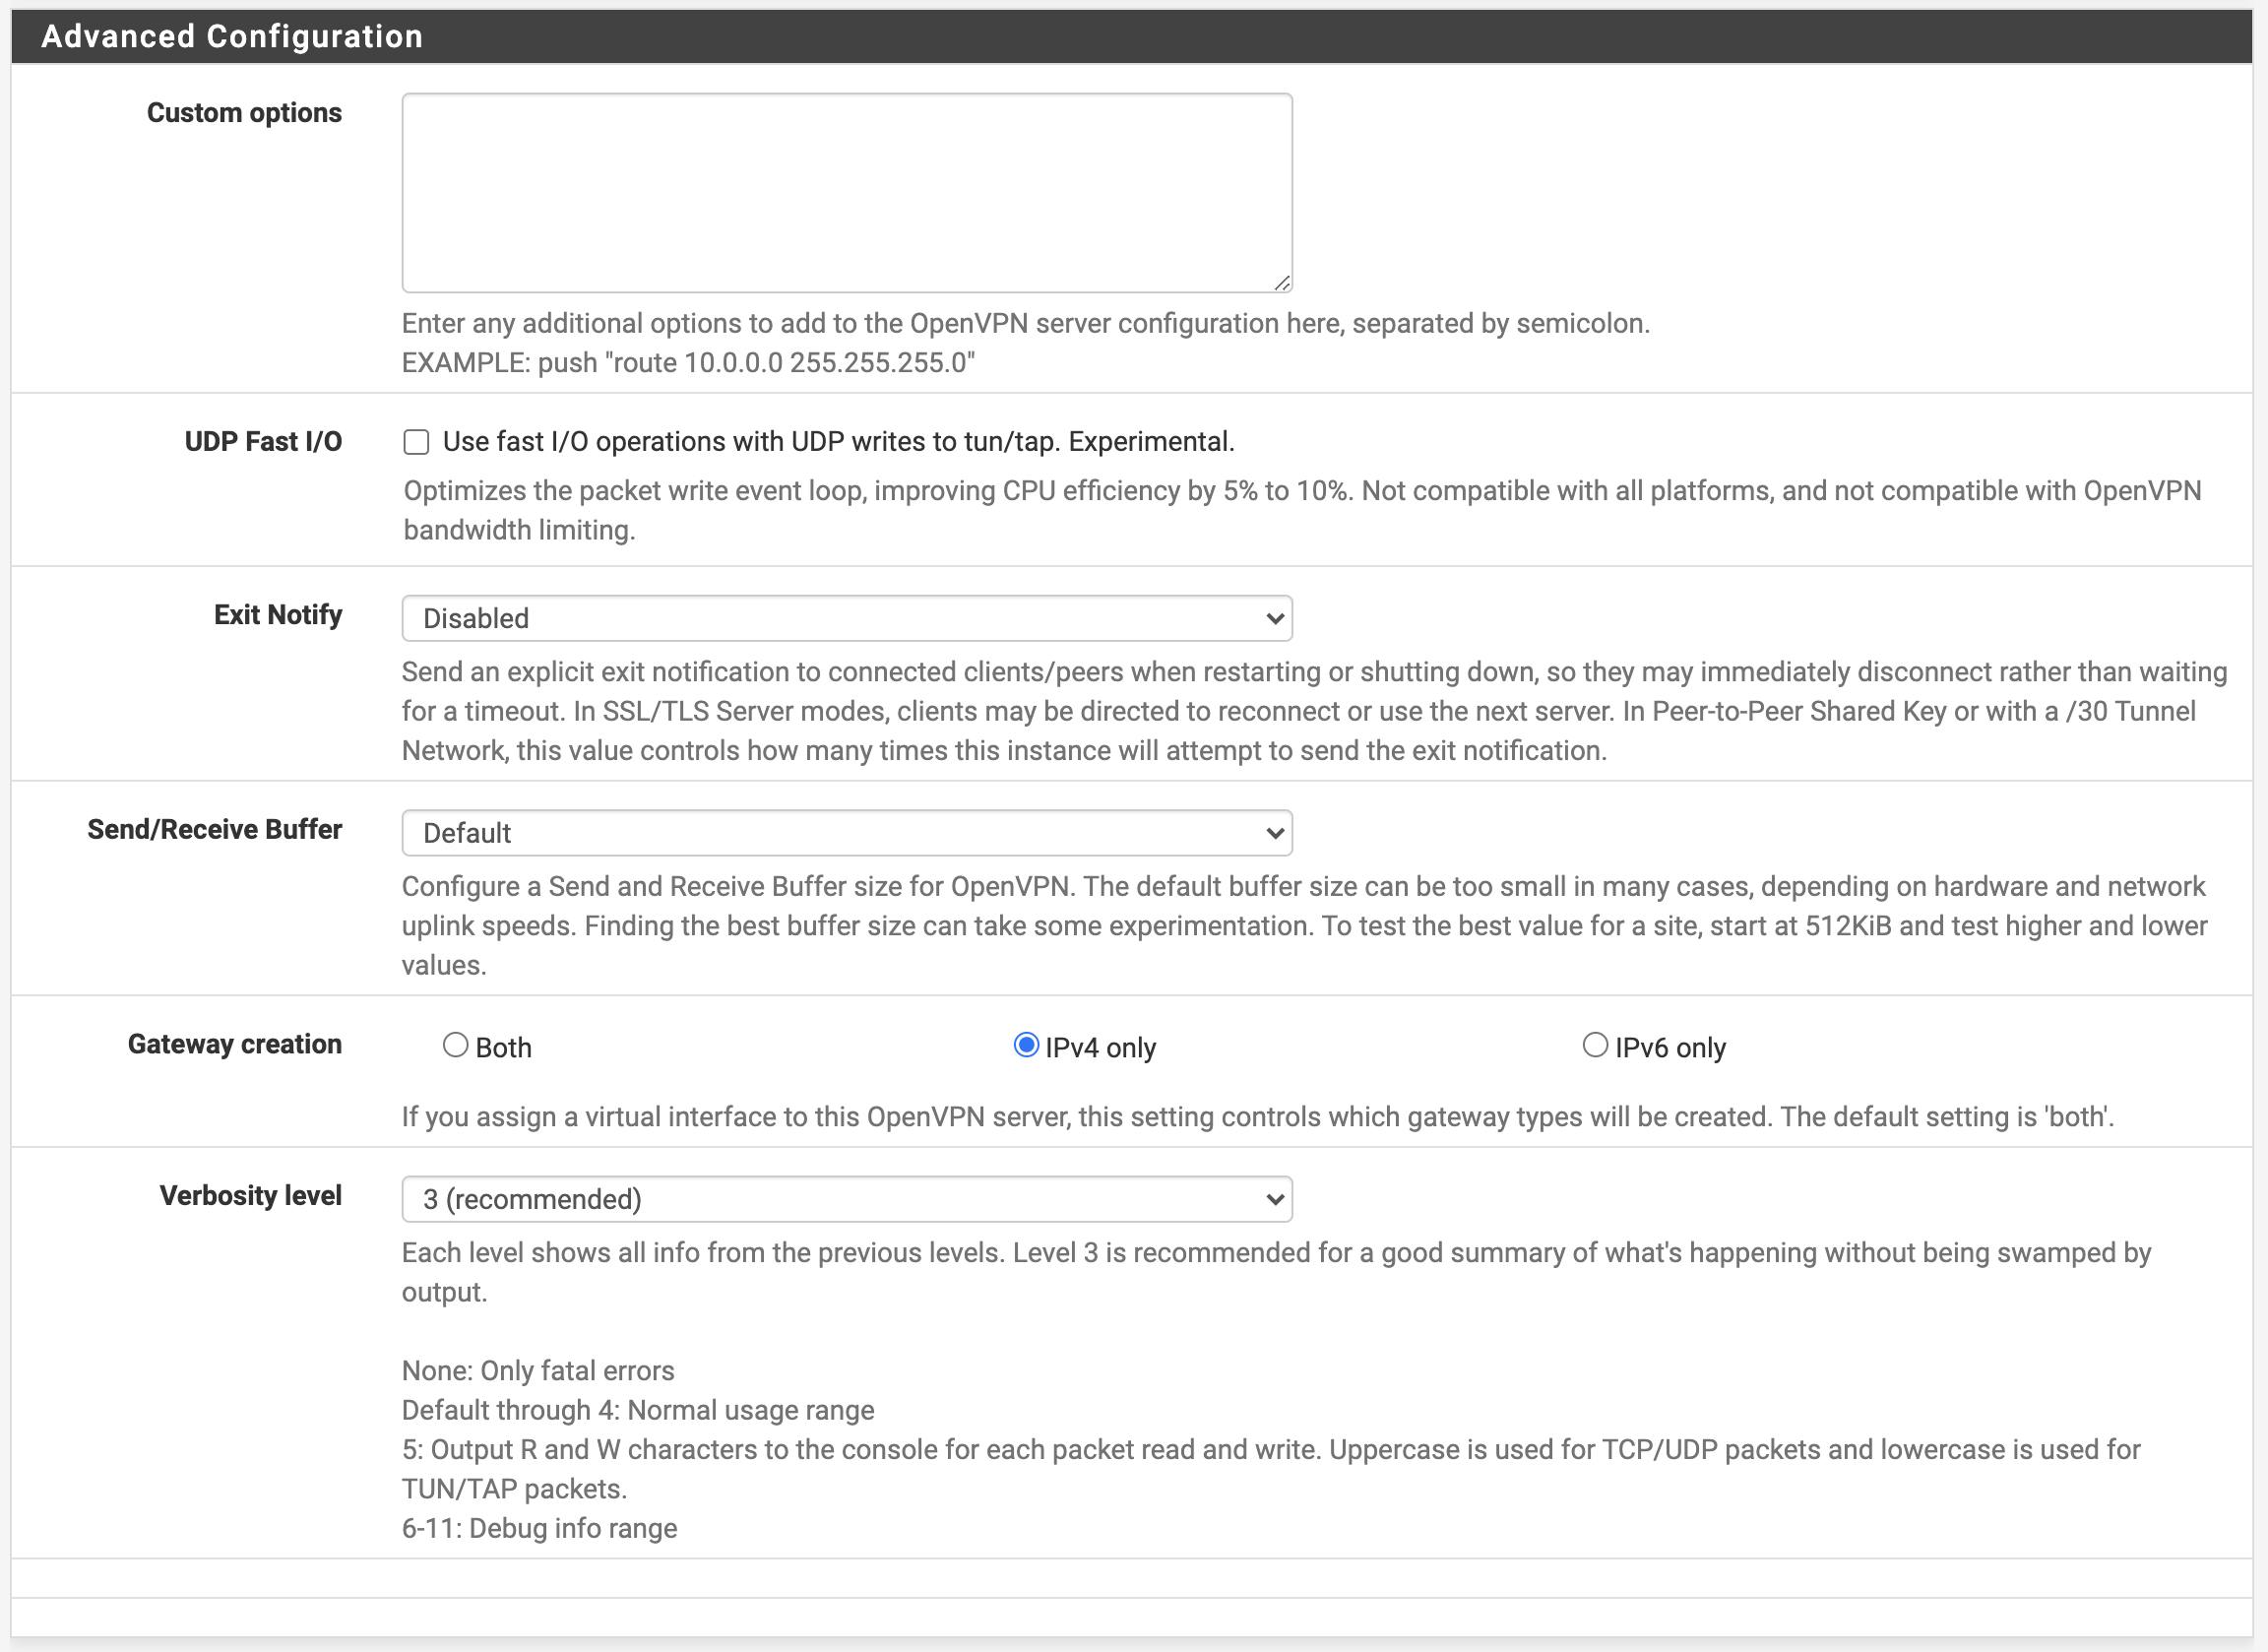
Custom options: Leave blank
UDP Fast I/O: Unchecked
Exit Notify: Disabled
Send/Receive Buffer: Default
Gateway creation: IPv4 Only - USG only seems to vomit with anything other than this selected
Verbosity level: 3 - Set this higher if you need to troubleshoot and change back once the tunnel is up.
Click Save
Unifi USG
The following steps assume that you are comfortable with the command line, have an Unifi Controller (or cloud key) setup, and know where to place the file. More information on Ubiquiti's website.
First, we are going to SSH into the Unifi USG.
Once you are logged into the USG via SSH elevate yourself to root
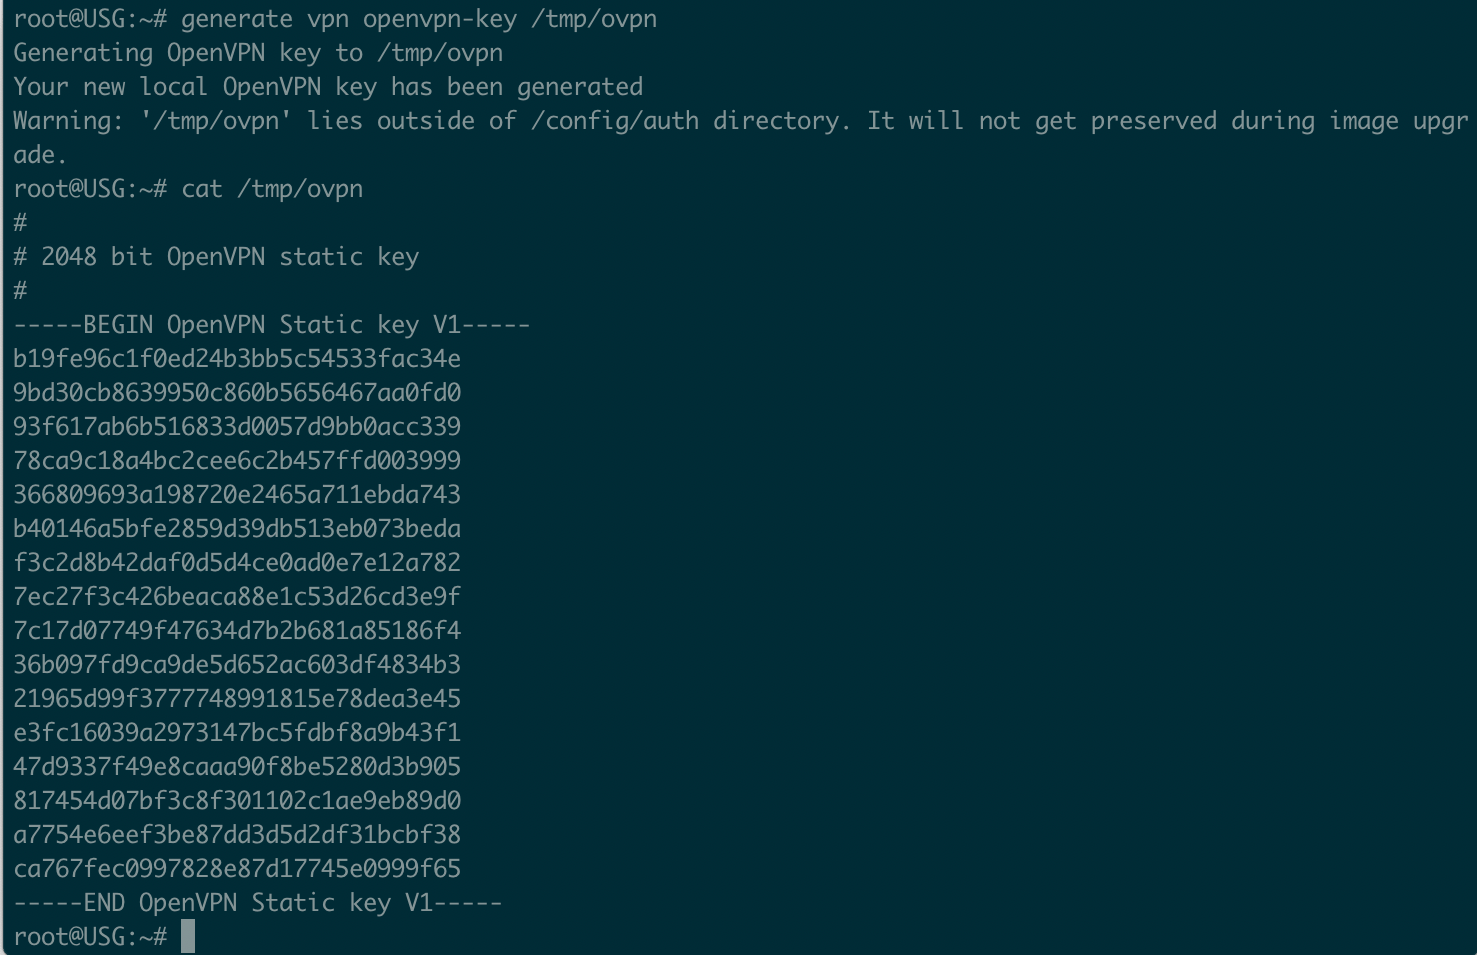
Now we need to copy the key out and remove the line breaks. The text between BEGIN OpenVPN Static key V1 and END all needs to be formatted into one line. Use your favorite plaintext editor such as VSCode or Notepad++. Don't worry about the file being persistent across upgrades. We are not leaving it on the filesystem in the /tmp directory. Keep a copy of the key with line breaks for later.
Unifi Controller
From the main page, navigate to the Settings page by clicking the gear icon. Then to Settings > VPN > VPN Connections > UniFi to UniFi VPN. Yes I know we are not connecting an Unifi to Unifi device however this is how it is laid out in the controller. Don't shoot the messenger on this one.
Fill in the information to match pfSense.
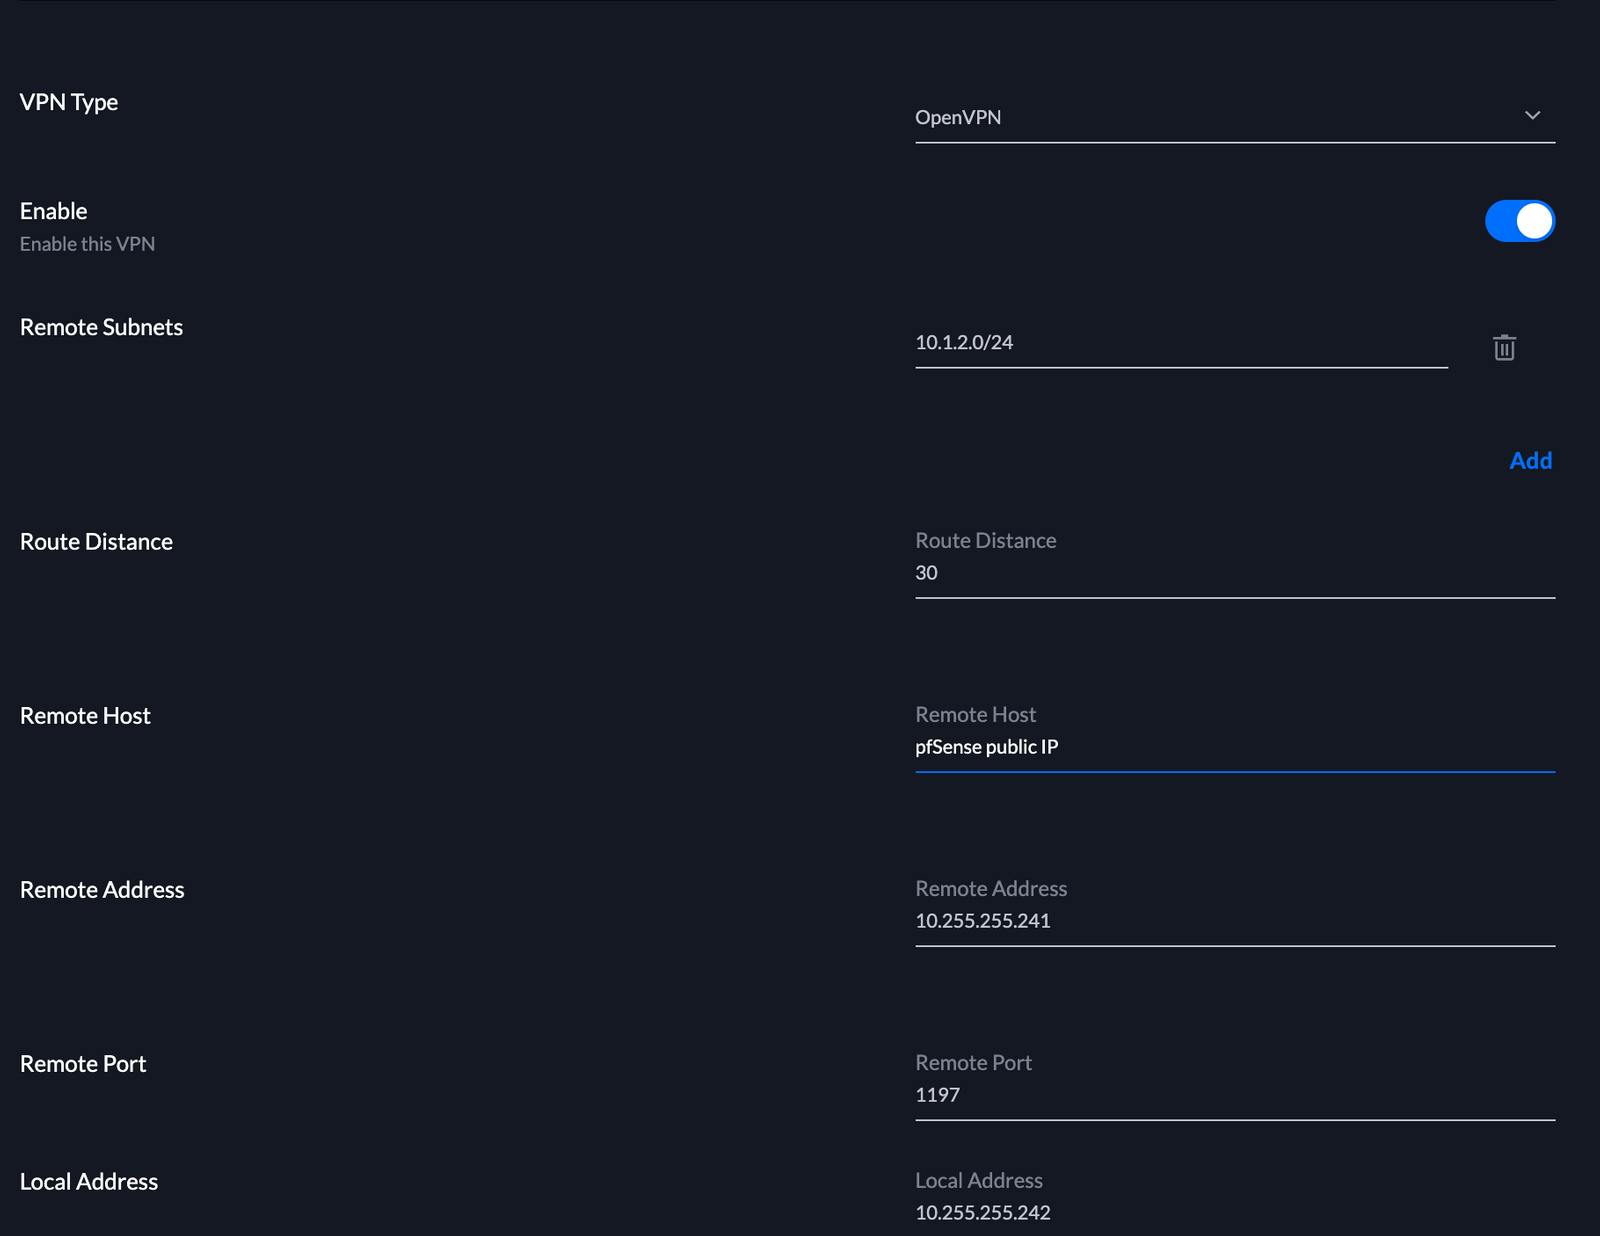
VPN Type: OpenVPN
Remote subnets: List of subnets routed by pfSense that you would like accessible from the Unifi USG side of the VPN. Click add to add each subnet individually.
Route Distance: 30
Remote Host: The public IP address of the pfSense server
Remote Address: This will be the lowest IP in the tunnel network subnet setup on the pfSense OpenVPN instance. In my case, this will be 10.255.255.241/28
Remote Port: 1197 - This is the chosen OpenVPN port chosen when setting up the pfSense server
Local Address: This will be the next IP in the tunnel network subnet setup on the pfSense OpenVPN instance. This will be 10.255.255.242/28 for this guide.

Local Port: 1197
Shared Secret Key: This is the key generated from the command line. Just paste it in and ensure that there are no spaces or extra characters in it.
Click Done.
Back to pfSense
Now time to add the firewall rule and shared key for the OpenVPN tunnel.
First, navigate to VPN > OpenVPN and to the OpenVPN server that was created earlier and click the pencil to edit.
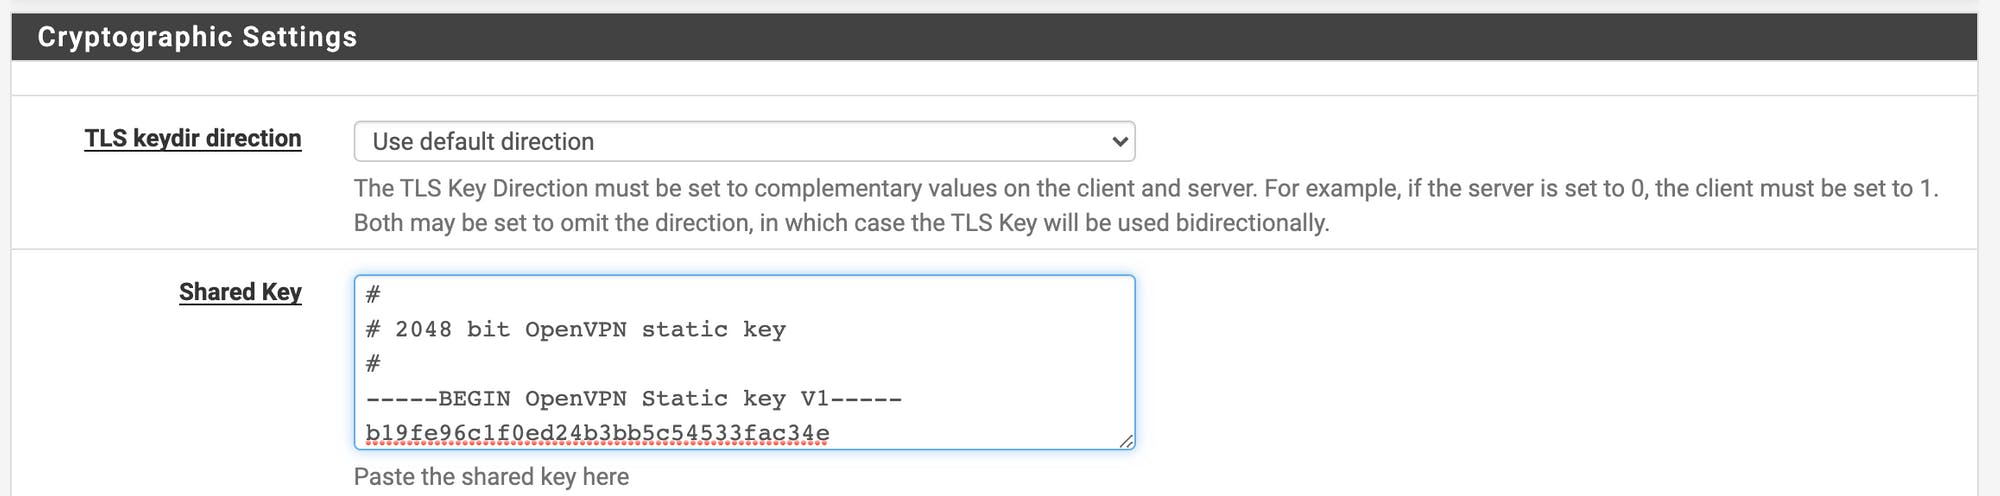
Paste the USG-generated key with line breaks into the section called Shared Key text box and click save.
Now let's add a firewall rule to allow the USG to establish an OpenVPN connection. Click Firewall > Rules
On the WAN tab add a new rule and match it to the screenshot
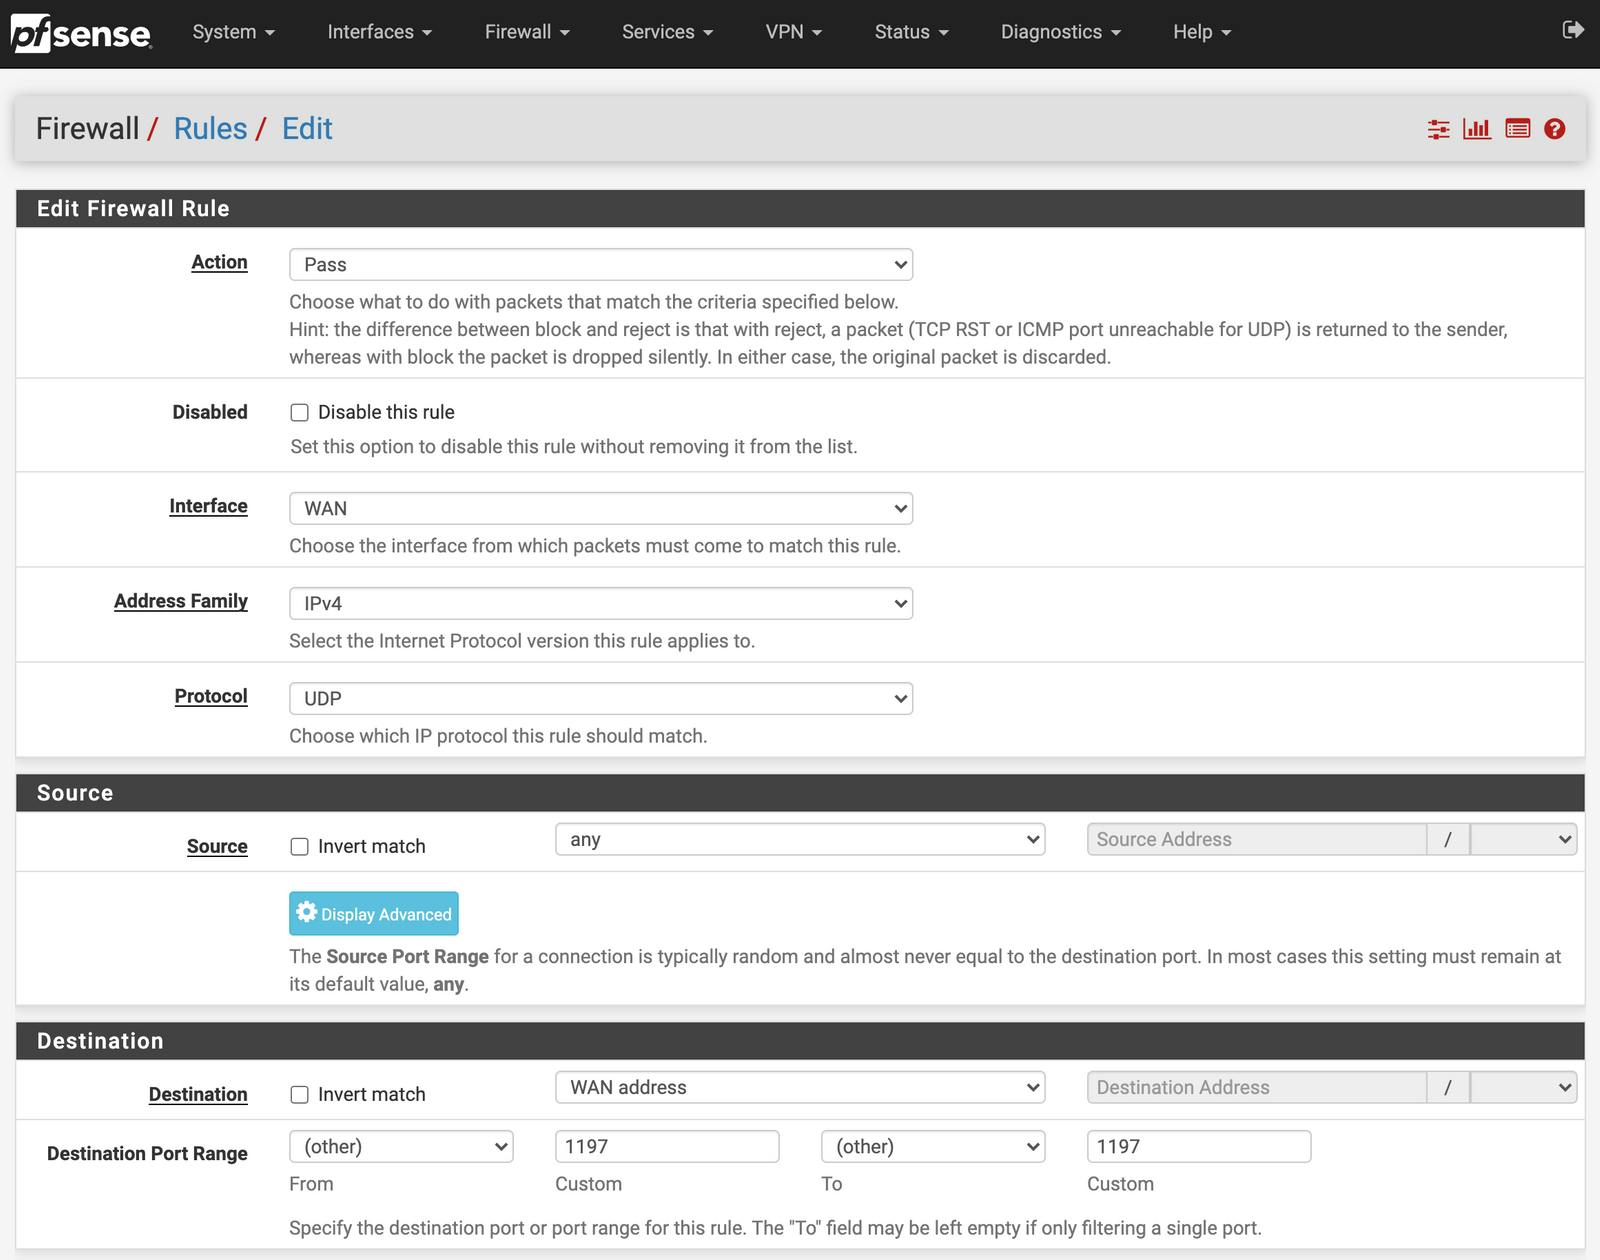
Action: Pass
Disabled: Unchecked
Interface: WAN - or whichever you previously set for the OpenVPN Server
Address Family: IPv4
Protocol: UDP
Source: Any - if your home location's IP does not change, you can set this to a Single Host or Alias and enter your home IP. Mine is dynamic so I left this as any.
Destination: WAN Address or interface address if the OpenVPN server is listening on another address
Destination Port Range: 1197 - Set this to the OpenVPN server port in both boxes

Log: Unchecked
Description: A friendly name for the rule
Click save and apply the rule on the following screen.
Add another rule to allow the OpenVPN server to go from any source to any destination. This can be locked down further however per my requirements, any-to-any works best for me.
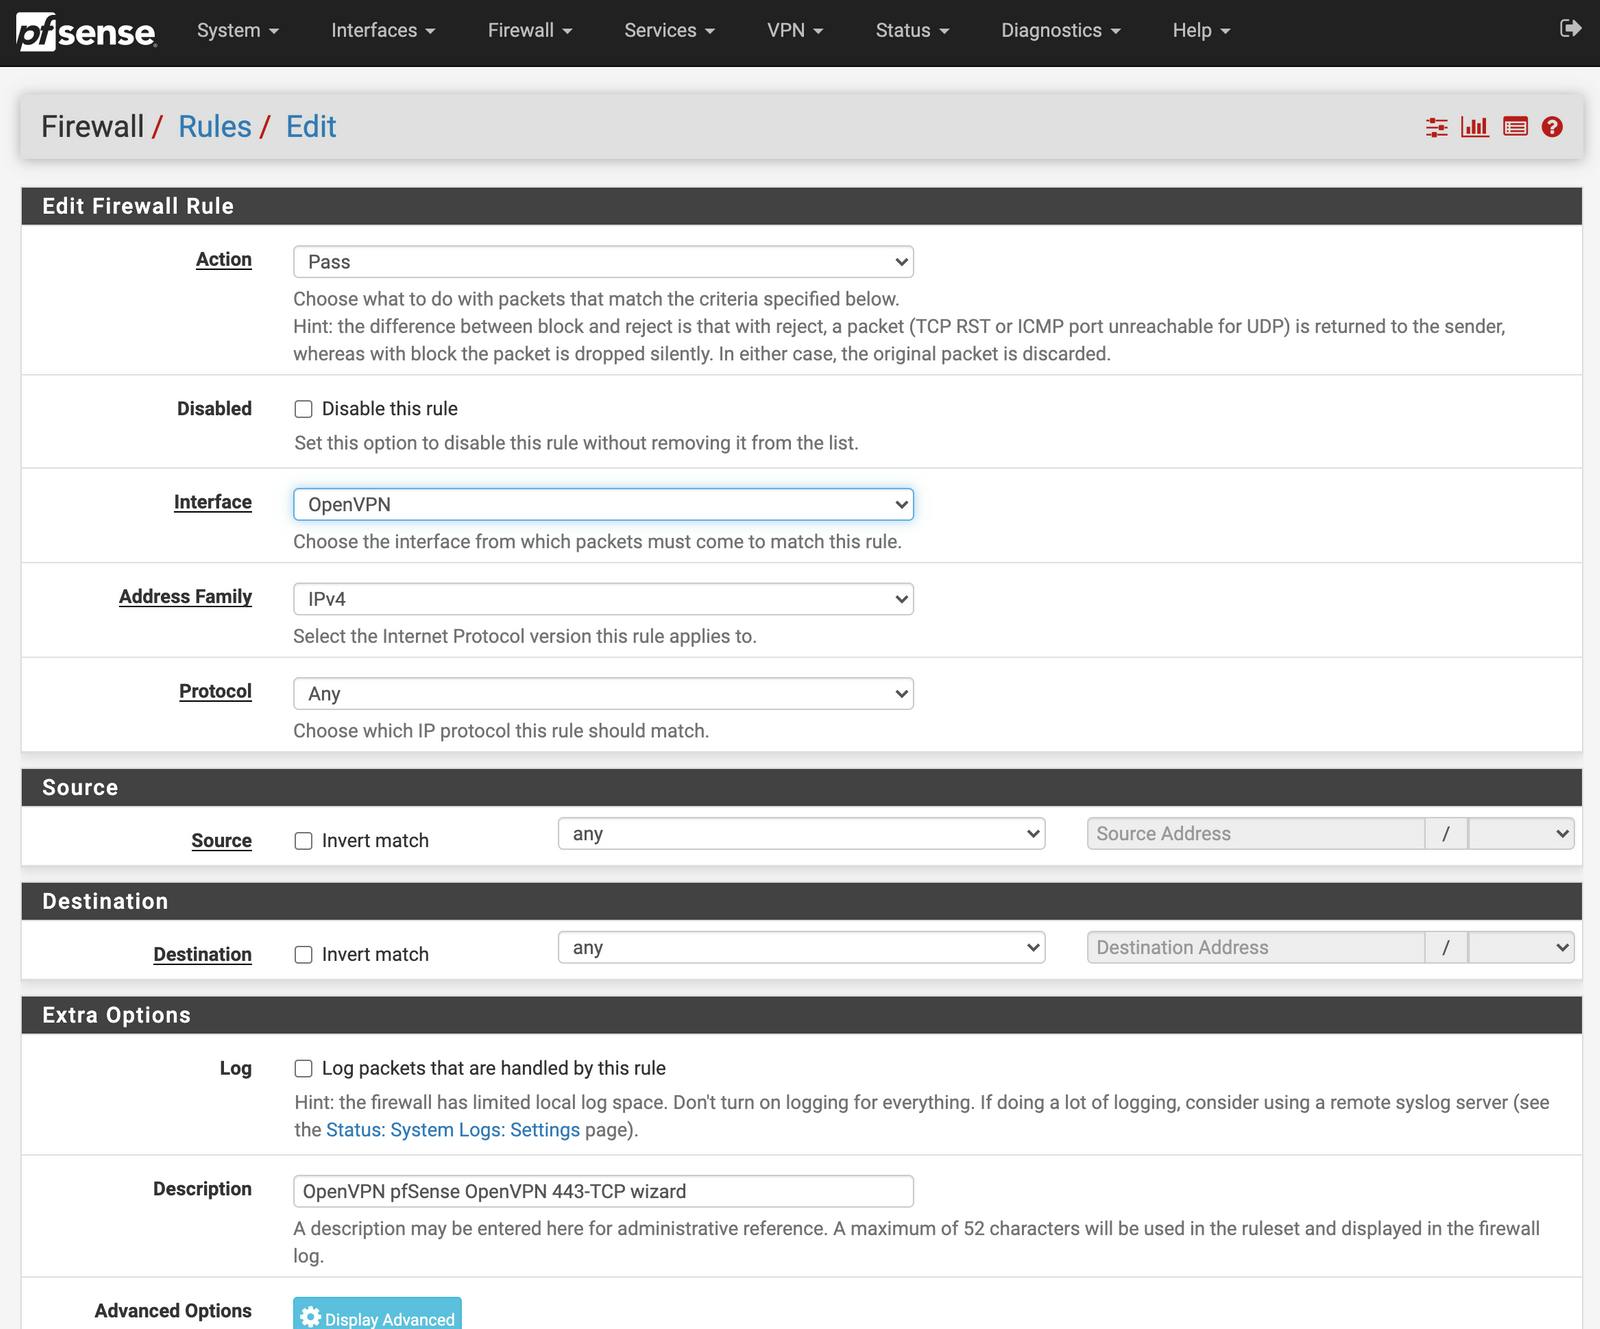
Action: Pass
Disabled: Unchecked
Interface: OpenVPN
Address Family: IPv4
Protocol: Any
Source: Any
Destination: Any
Destination Port Range: Any
Log: Unchecked
Description: A friendly name for the rule
Save and apply the rule.
Back to the Unifi Controller
Now it's time to SSH into the Unifi Controller. These steps are specific to the Unifi Controller installed on a VM and not the Cloud Key or any other device. The config.gateway.json file contents will remain the same.
SSH into the controller and navigate to /var/lib/unifi/sites/<site_id>/ where site_id can be found from the Unifi Controller URL (https://IP.AD.DR.ESS:8443/manage/site/<site_id>/v2/).
In this folder open your favorite command line text editor and edit the file config.gateway.json. If the file is not there, create it.
Within the file, add the below contents and save.
{
 "interfaces": {
  "openvpn": {
   "vtun64": {
    "encryption": "aes256"
   }
  }
 }
}
vtun64 is the default USG OpenVPN interface. The aes265 option must be defined otherwise the USG defaults to a weaker encryption standard and will not negotiate a connection with the pfSense options set previously. On the USG there will be a performance hit for this level of encryption through my upload and download from my ISP will never saturate the USG.
Now, from the Unifi Controller select the USG and force provision it.
While it is provisioning you can check the status of the OpenVPN tunnel from the pfSense GUI. To view it navigate to Status > OpenVPN. If there are issues, take a look at the logs for OpenVPN. If needed you can also SSH into the USG and take a look at /var/log/messages and wait for the tunnel status to be logged as successful.
The Result
Once the tunnel is up we are able to access all resources at the colocation across the VPN without having to establish a connection each time. This tunnel is also bi-directional and allows for servers on the pfSense side to access resources on the USG side.
Let us see how this compares against my initial requirements:
✅ OpenVPN tunnel should always be online even if my home IP changes
✅ Subnets on both sides should be accessible by each side
✅ Not all traffic should go through the VPN, only known subnets on both sides
✅ No additional hardware, only existing Unifi USG at home and the pfSense SG-2440 at the colocation facility
Conclusion
Now we have our LAN network at home stretched across the internet to the colocation space. This connection could be used to place a backup device at a remote site, say a friend's house, and vice versa where both are able to access services on each end as if they were local.
Feel free to contact me if you run into any issues. This setup took me months of research in my very limited free time to establish based on outdated guides online and posts missing information.